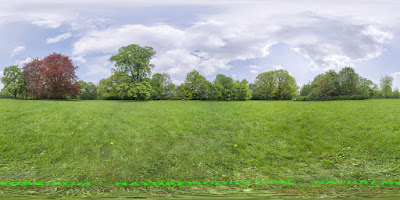
It is a set of 48 images that I took in 2010 in the Stünz Park in Leipzig, and thanks to the excellent stitching engine of Lightroom, and my new computer could combine these photos, finally!
You can walk through this panorama in full screen ("toggle full screen", left from shopping cart) and rotate left, right, up and down and zoom in to see full detail. Now, try to count the dandelions and daisies..., enjoy! The arrows have been put in by 360cities and link to other panoramas (better not click on them if you want to stay in the panorama).
This is how I made this 360 degree panorama:
I took 48 photos on a tripod with a 18 mm lens that overlap enough (portrait orientation). Covering 360 degrees with much fewer images is only possible with a wider lens (<18mm) such as a fisheye lens. The photos were stitched together in Lightroom, which worked better than with Photoshop or Hugin, although top and bottom were not complete (because clouds had been moving and I worked without a nodal point adapter). I made some color and contrast adjustments and exported the equirectangular image of this panorama.

These are the rough steps that I took in Photoshop for this final version:
* cut the picture in two parts at a vertical line where the new outer border should come, and switch these parts. The previous outer border is now more central, and you can now see what should be a seamless border does not come perfectly out of Lightroom. The geometric fit is good, but you need to correct differences in color and brightness (burn/dodge/clone).
* extend canvas size at the top and bottom region so that the side ratio is exactly 2:1. If the image is 2000 pixels wide and 980 high, it needs 10 pixels at top and bottom more.
* now get rid of incomplete top and bottom. One way is to stretch (layer from background,edit->transform->scale) to top and bottom so that all bad part are gone. A better way is this nice free (32 bit) plugin super cubic:
http://www.superrune.com/tools/supercubic.php
It converts the equirectangular projection to 6 cube faces, or as we need the top and bottom face. You can now use the spot healing brush to complete the clouds and remove the tripod. See the site for instructions how to use and convert back to equirectangular. In this step I also added my site "naturemoods.com".
* After some final adjustments, including sharpening, it is ready to upload at 360cities.com!
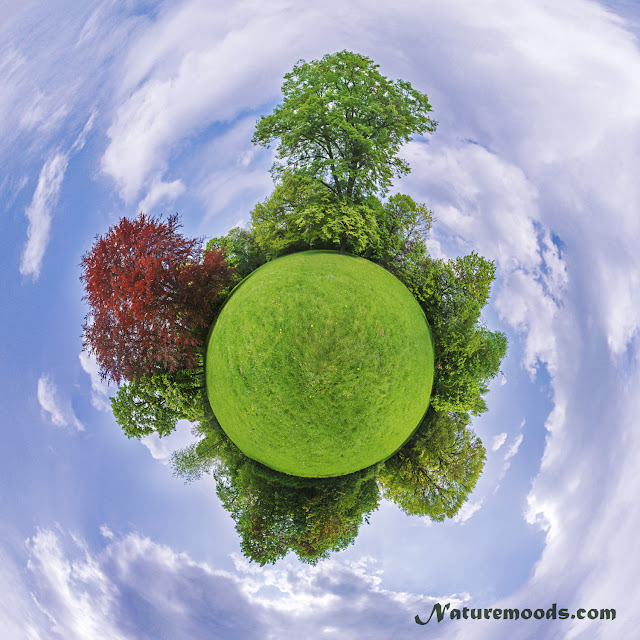
But it is also nice to make a "little planet" from the equirectangular image.

This is how:
- use canvas size to make the image square, 1:1
- move the image to the bottom
- use filter -> distort -> spherize, vertical only. This makes the sky longer, and the bottom shorter.
- stretch (edit->transform->scale) make it fill the square
- rotate 180 degrees
- use filter -> distort -> polar coordinates, to make the planet
- with filter -> lens correction you can make the center look smaller. You can apply it several times.
- with filter -> liquify - to make own distortions toward the edges. In my case, I pulled at the top of the big tree to make it look like a normal tree again.
- rote and crop, ready!
Update 2020 - another Panorama
In Autumn 2019 several older trees got damaged and were removed from the park. Apart from the panorama in 2010, I also tried one in 2013 with a cheap ultra wide angle lens (58mm 0.45X Weitwinkel Objektiv Konverter Makro for 35€). This was the first and the last time I used this lens; vignetting was terrible and lens sharpness was only in the center acceptable and colors and contrast were horrible. But it was a wonderful day, with spring flowers everywhere, and as I realized my attempt was a time document with the older trees still standing strong. I therefore did a more rigorous editing and cutting in Lighroom and PS, to get rid of as much 'bad' as possible. In PS I manually edited the clipping masks of each layer to get the most sharp areas. I didn't believe in this for a long time, but result is acceptable.
One additional challenge to overcome was the horizon that was not straight. Photoshop seems to have problems correcting this, but you can easily straighten your panorama with the free software Hugin:
- add image (only one)
- lens type is equirectangular
- go to the panorama preview - press the button straighten
- left click to move/set center
- right click (left or right from center) to change angle from center - straightens horizon
to export from Hugin: go to advanced/expert mode, go directly to Stitcher and export. Do not forget to 'calculate optimal size' for the original dimensions.
You can now further edit in PS, e.g. to edit top and bottom. The free plugin by superrune I proposed earlier is 32 bit, and does not work in 64 bit PS. I considered buying their 64bit plugin for 35$, but I decided to get for a bit more the Flexify 2 plugin from Flaming Pear, which can do 'Nadir and Zenit' editing and incredibly much more projections, from mini planets to origami globes.
Keine Kommentare:
Kommentar veröffentlichen