Samstag, 26. November 2016
When do you throw your food away?
It is a challenge for all of us: we do not want to eat bad food, but neither we want to be bad for the environment or a shame to hungry people. So when do we throw our food away? When the date is expired, or when it looks or smells bad? Every person has its own way, but it makes sense to give it more thought. Therefore I made this diagram to make a fair and healthy decision.
Diagram to determine if your food is good or bad
Rule of thirds
When you buy a product, look at the 'best before' date. Count the days, weeks or months that is in the future and add one third: this is the more realistic date of expiration. So: the for milk you may have three days left, but you can probably use it four days; for a glass of vegetables for which you have 9 months will last 12, etc. Some products like flour, pasta, rice and some canned food will even last much longer. Meat that expires the next day, may last 0.3 day longer, but with such low margins you better stick to the date!
Why is it important not to throw it away on the expiration date? Because manufacturers reduce the expiration date every year silently and this seems an ongoing loop. So more and more food is wasted every year! See here (NL) and here (DE). Throwing it away on the expiration date is not very responsible.
The shelf life is actively reduced by manufacturers that set the expiration date earlier. As a result people are surprised that their food is expired earlier, but still throw it away, increasing food waste. They buy a new package instead. As a result sales go up. Now the manufacturers have an incentive to further reduce the shelf life of their products. Completely unnecessarily from the point of the food quality! Therefore it makes sense to use the diagram above to determine if you should throw your food away instead of the date!
Final notes
- It is mostly safe to follow the diagram here, but it is on your own risk. Internet resources like this one can give you advice but cannot be hold responsible
- The manufacturer can be hold responsible for food going bad when it happens before the 'best before date'. Therefore it is logical to have the date early set, but there are not any legal rules for how early.
- Because the date is set earlier year by year, the rule of thirds is very rough and may be one day rather a 'rule of halfs'.
Sonntag, 13. November 2016
The supermoon of 14.11.2016 explained
Supermoon
The Moon has an elliptical orbit around Earth, and the Earth is not exactly in the middle (like the yolk in the egg). Therefore each month the Moon has a close position to Earth (Perigee) and a far position to Earth (Apogee). When it is close, it appears on average 14% larger (in diameter) and 30% (surface area) brighter when it is full moon. When both Perigee moon and full moon occur together, we speak of a supermoon (in far position of a micromoon).
The Earth has a similar elliptical orbit around the sun and also has a close and far position to the sun, together with the Moon. Hence, sometimes the gravity effect of the Sun is stronger than other times, causing the Moon to vary in its far and close position. The close position varies roughly between
356.000 and 371.000 km while the far position varies roughly between 404.000 and 407.000 km.
Far and close distances for every moon rotation from 2001 to 2100. Data Source: Moon Perigee and Apogee Table Courtesy of Fred Espenak, www.Astropixels.com. Full moons are in yellow, data Source: Keith Cooley, http://home.hiwaay.net/~krcool/Astro/moon/fullmoon.htm.
When the Earth would not turn around the Sun, the close distance would always fall together with a full moon. But because of the rotation around the sun, the light angle changes, causing a small shift in the cycle of full moon. After 14 moon cycles, both cycles are in the same position again, with a full moon in the close position, hence almost once every year! The interesting thing is that it is mostly never the same position relative to the sun, and therefore somewhere between 356.000 - 371.000 km as explained above. And that makes the the 14.11.2016 special; this full moon in Perigee position is closer than after most other 14 moon cycles. A super close, superbig moon! However this difference is much smaller than between a Perigee and Apogee month.
A close-up of the previous graph (only the very low band with full moons!), with the 100 closest moons from 2001 to 2100 and full moon in yellow and the dates everyone is talking about in orange. Closer moons will follow several times this century, so it is not so rare. And remember from the first graph: the distance and hence appearance diameters of all full moons in this graph do not much differ to the eye and are actually all supermoons!
The moon illusion
People often think they see a supermoon. But in fact they are victim of the so called moon illusion! A very good explanation is on Wikipedia.
Macro photography in millimeter range: microscope vs DSLR camera
This motive, a 30 million year old ant trapped in Baltic amber, is about 3 by 4 mm. Wit a normal macro lens or extension tubes, it is not possible to get such a small object so detailed captured. Reversing a wide angle (zoom) lens with an adapter (reverse ring or retro adapter) gives high magnifications and it is possible to get a good picture (right two images). I also had the opportunity to use a microscope with camera, the VHX2000 from Keyence, which is specially built for imaging small objects. I found that both are not perfect solutions, which makes a comparison meaningful.
Before I get to the differences, some words on what they have in common. Both work with lenses and a digital sensor. The depth of field is very limited and both require a stack of 10-20 images from bottom to top that are either merged in a stacking program like CombineZP or Photoshop*. They both disappoint in image quality and detail for printing on a A3 format. For more detail you need to zoom in and make a mosaic composite**. The ant image is based on a single stack image.
VHX2000 | DSLR |
---|---|
Stability | |
Stable platform present | Need to stabilize camera and object carefully |
Image Quality | |
1600 x 1200 (3200 x 2400) pixel resolution | 5184 x 3456 pixel resolution |
Compressed/filtered data | Raw data |
Crisp sharpness difficult | Crisp sharpness difficult |
Details such as hairs visible | Details such as hairs visible |
Photo stacks by software | Photo stacks manually |
Optimal stacking |
Non-optimal stacking (movement of camera possible when turning wheel) |
Light | |
Artificial light | Natural and artificial light possible |
Light from all sides (adjustable) | Light from one side (with natural light) |
Light can work 'flat' | Lighting very flexible in giving depth |
Clipping of light areas | Fewer clipping areas (with Raw data) |
Other | |
Zoom under 1 mm possible | Zoom limited (here to about 2 mm objects) |
Relatively fast | Time consuming |
Expensive | Not expensive, when camera and lens are already in possession |
Conclusion:
The pictures with either a VHX2000 or a reverse ring are slightly different, especially concerning color. The reverse ring method is more complicated and time consuming but gives an image quality that can keep up with a microscope image (apart from small lens distortions that are not considered here). For the price and quality, a reverse ring is a very attractive alternative to a microscope, when the object is not smaller than about 2 mm.
* On digital stacking:
1) CombineZP (freeware for stacking) gives nice results with the pyramid weighted average method. The idea is that the software reconstructs the 3d depth of the object. From the bottom layer, the sharpest is considered and build up to the top layer with complex algorithms.
2) Photoshop can also yield nice results with a different method. It just keeps the most sharp part from each layer. Sometimes the result is nicer than CombineZP, sometimes not. To do this, choose File => Scripts => Load files into stack. In the layer palette, select all layers. Then choose: Edit => Auto-Align Layers, followed by Edit => Auto-Blend Layers. Sometimes the result is better without Auto-Align (eventually manual align).
** Mosaic composite:
E.g. a mosaic of 6 image columns by 6 image rows with overlap in area for stitching gives at most 3 times more detail. With 20 stack layers per image, you need to manage 36x20=720 images (which I only did once). First you stack each mosaic part with the favored software, after which the mosaic is stitched together. This is time consuming because it often requires manual adjustments, and is only justified when an image is indeed to be presented at A3 format.
Montag, 31. Oktober 2016
De koffiespecht en de treinreis (NL)
De koffiespecht - ik kom er zo op.
Eerst even dit. Laatst zat ik in de trein en hoorde wat ik vaker hoor. Er werd omgeroepen 'Deze trein rijdt niet verder als...'. Wacht even, ver - verder - verst, DAN!, verder dan...
Tenzij de trein natuurlijk niet verder als stoptrein rijdt, maar als sneltrein (in de hoedanigheid van), dan is 'verder als' dus wel goed. Maar bij de vergrotende trap hoor je gewoon 'dan' te gebruiken, dat hebben we zo afgesproken. Toch wordt het misschien ooit 'verder als'. Als iedereen namelijk hetzelfde steeds fout zegt, dan is er een soort consensus dat het goed is. Afspraken, zoals bij de vergrotende trap, kun je veranderen.
Anders ligt dat bij grammaticale logica. Deze sneltrein word stoptrein, zonder t, is echt fout. Ook als iedereen het fout schrijft zal het nooit correct worden. Dit is namelijk logica afgeleid uit een algemene afspraak dat voor vele werkwoorden geldt. Als je dit zou toestaan omdat veel mensen het fout doen, dan zou dat op alle andere werkwoorden ook toegepast mogen worden. Dan krijg je gekke dingen als 'de trein stop niet bij het volgende station'.
Er zijn nog andere uitspraken die om logische reden onjuist zijn. Bijvoorbeeld 'de trein rijdt omhoog'. Dat kan niet. Een trein kan alleen maar in tekenfilms direct omhoog rijden, want 'omhoog' is een verticale beweging, net als omlaag. Zo zijn 'vooruit' en 'achteruit' de horizontale beweging. Een trein kan wel schuin omhoog rijden; mooier is echter 'de trein reed de berg op'.
Nou vooruit, nog een regeltje dan. 't Kofschip, 't fokschaap en xtc-coffeeshop hebben de medeklinkers t, x, k, f, s, c, h en p. Als de stam van een zwak werkwoord hierop eindigt dan gebruik je in de onvoltooid verleden tijd -te en -ten, en anders -de en -den. Het blijven rotwoorden. Wie onthoudt die nou? Dus kan er nog wel eentje bij; ik introduceer 'koffiespecht'.
De koffiespecht drinkt wel een kopje mee als het om de Nederlandse taal gaat! Gezelliger kunnen we niet maken ;-).
Mittwoch, 12. Oktober 2016
Free desktop backgrounds
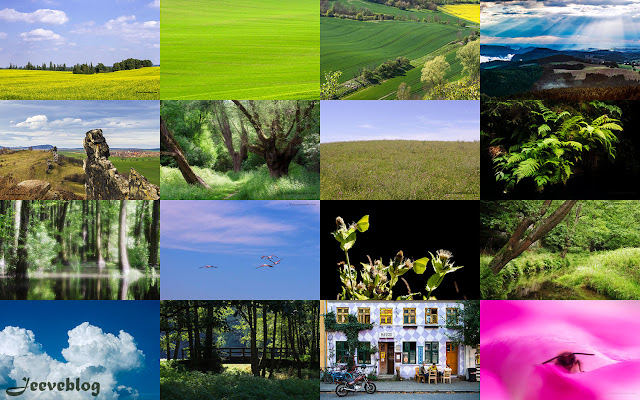
A small present from Naturemoods.com, a package of backgrounds for you computer in the formats 1920x1080, 1280x800, 1366x768 and 1024x768. Download HERE.
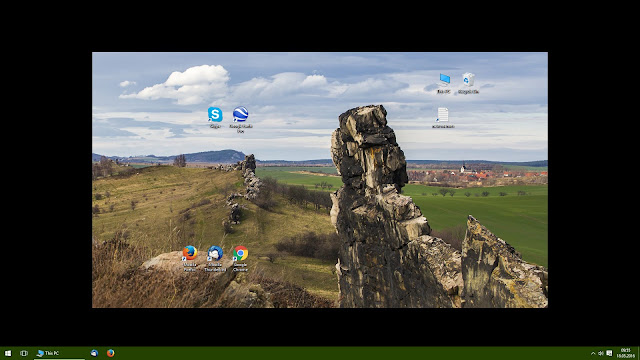
A smaller fit can be elegant, supply a better overview of your icons and save energy with a black background.
How to use (Windows 10):
- Open the downloaded zip
- Copy the folder Backgrounds1 to "Pictures" (This PC)
- Go to your desktop and right-click on an empty spot, and choose "Personalize"
- Here you can set Background to "Picture".
- Important: Set "Choose a fit" to "Center" first! (Backgrounds are not made to stretch, span, etc.!)
- Click on "Browse" to choose you picture. Navigate to the folder Backgrounds1 in Pictures where you have put it.
- Now you can try different backgrounds to find out what your favorite is, in the size of your desktop. You can choose one that fits your background, but you can also choose a smaller one (as above in the example) when you wish.
- If you are done and still in the settings window, you see a list on the left. "Background" first and "Lock screen" as third. Go there, and select a picture here as well. You can also set "Show lock screen background picture on the sign-in screen" to ON.
Rainbows and butterflies in dutch agricultural landscapes - 30 years ago
Rainbow
Aglais Io - The European Peacock
on Lythrum salicaria - Purple loosestrife
Along ditches: purple loosestrife, nettles, and other plants preferring nutrient-rich soils
Along the maize monocultures; quite some diversity, including Anthriscus sylvestris - Wild chervil.
--------------------------
These pictures were my very first, when I started photography. Now they are a time document from about 1988, almost 30 years ago.
Yes, it seemed so idyllic when I grew up. Some biodiversity between the agricultural fields; different weeds and at least 5 different butterflies flying regularly around each year. At that time I did not know the truth. Decades of fertilizer already destroyed most of the biodiversity. These were the species remaining! But it was the world I knew (my 'zero' reference). And it would become worse soon... New pesticides were being used and by 1992 the purple loosestrife disappeared completely from this area where I lived, along with the butterflies and bees visiting them. For who is not depressed enough: This happened AFTER 1992.
This change that I observed was definitely one of the reasons to dedicate a part of my life to nature conservation in agricultural landscapes. It seems I have to continue for a while...
---------------------
Freitag, 23. September 2016
Origami Butterfly Fun
I love butterflies. In origami they are very grateful to fold and design giving the world a little bit more color. On the left two of my older designs that are unlike any other butterfly design. The remaining four developed recently after I gave a small workshop on my simple but elegant model (butterfly 1) on which they are based.
Dienstag, 2. August 2016
Die tollsten Insektenarten aus Ungarn (und zwei unidentifizierte Pflanzenarten)
In Juni war ich auf Entdeckungsreise in Ost-Ungarn und habe dabei jede Menge (für uns) besondere Insekten gesehen. Hier eine kleine Liste und paar Fotos von Arten die ich im kurzen Zeitraum von nur 2 Wochen entdecken konnte.
Die größten Europäischen Käferarten:
Hischkäfer - Lucanus cervus
Großer Eichenbock - Cerambyx cerdo
sowie
Balkenschröter (kleiner Hischkäfer) - Dorcus parallelipipedus
Nashornkäfer - Oryctes nasicornis
Walker (Julikäfer) - Polyphylla fullo
Gelbrand - Dytiscus sp./Cybister sp. - (Larve in einem Teich)
Der große Eichenbock - Cerambyx cerdo haben wir im Stadtzentrum von Szeged gefunden, auf nur einen bestimmten alte Eiche. Die andere 30 Eichen waren nicht betroffen und somit gibt es noch Potential für diese Art um hier weiter zu überleben. Die Käfer wählen nur Eichen ab 100 Jahre alt aus. Die Art ist so bedroht weil sie eine sog. 'kritische Verbunddistanz' von 2 Km hat, und ohne große Eichenwälder nur in isolierten Populationen leben kann.
Biotop Bergwald mit alten Eichen:
Schwalbenschwanz - Papilio machaon,
sowie Segelfalter - Iphiclides podalirius
Großer Waldportier - Hipparchia fagi (hier auf der Suche nach Salze :)
Kaisermantel - Argynnis paphia
sowie:
Großer Schillerfalter - Apatura Iris
Kleiner Eisvogel - Limenitis/Ladoga camilla
Roter Buntkurzflügler - Oxyporus rufus
Kleiner Leuchtkäfer - Lamprohiza splendidula
Haselnussbohrer - Curculio nucum
Bergzikade - Cicadetta montana
Biotop Flußaue:
Pfaendlers Grabschrecke - Tridactylus pfaendleri - lebt am Ufer
Gefleckte Ameisenjungfer - Euroleon nostras
Schwarzbrauner Trauerfalter - Neptis sappho - für mich ein Highlight am letzten Tag!
Sonstige interessante Arten:
Weißfleckwidderchen - Syntomis phegea - kam massenweise vor im Wald
Dornen-Randwanze - Philomorpha laciniata
Unbekannte Krabbenspinne - Synaema sp. - mit einer Schwebfliege als Beute
Matter Pillendreher - Sisyphus schaefferi
Blatthornkäfer - Mimela aurata
Großer Fuchs - Nymphalis polychloros
Resedaweißling - Pontia edusa
Verschiedene Perlmutfalter
Taubenschwänzchen - Macroglossum stellatarum
Hornissenglasflügler - Sesia apiformis, und andere Sesiidae
Und zum Schluss, zwei spannende unidentifizierte Pflanzen:
Wer sie kennt bitte ein Kommentar hinterlassen!
Edit: Rechts ist die schopfige Traubenhyazinthe (Muscari comosum). Eine ähnliche Art ist die schmalblütige Traubenhyazinthe (Muscari tenuiflorum), welche in Deutschland nur auf den trockenen Kalkmagerrasen Thüringens vorkommt.
Freitag, 29. Juli 2016
Microsoft gegen Muslime, oder die Macht über unsere Gedanken?
Ach ja, dann nochmal: "wer aus Angst geflüchtet ist, auch ein Muslim, verdient Hilfe, weil wir Menschen untereinander sind, auch wenn der Andere eine Religion hat die wir nicht verstehen." Nur mal um alternative Gedanken im Gehirn zu aktivieren.
Montag, 11. Juli 2016
Freddy the dancing beetle
Sonntag, 12. Juni 2016
Obstfliegen loswerden - Das beste Rezept
Jedes Jahr kommen sie wieder in große Zahlen und versauen die schöne Zeit in der Küche: Obstfliegen. Mit dieses Rezept, basierend auf viele andere Rezepte aus dem Netz und einige eigene Experimente, werden sie angelockt und ertrinken. Die Mischung am besten auf einem flachen
Teller(chen) zusammen-mischen und irgendwo in der Küche hinstellen.
Hier kommt die Basis:
1 Tl Zucker
2 Tl Balsamico-Essig
1 Tl Zitronensaft
ein Schuss Wasser
ein Tropfen Spülmittel
Gut rühren bis der Zucker gelöst ist. Das Spülmittel bricht die Oberflächenspannung, wodurch die Fliegen direkt ertrinken.Viele Varianten sind möglich. Zucker kann man austauschen gegen Fruchtsirup, Zitronensaft gegen ein zweiter Tropfen Spülmittel wenn dieses stark nach Zitrone riecht, usw. Auch Weißweinessig und Gurkenwasser sind beliebt.
Historical image restoration - Reparatur von alte Bilder
Ich habe meine Seite mit der digitale Restaurierung alter Bilder erneuert und eine Liste mit Reparatur-Dienstleistungen hinzugefügt.
Mein Interesse für historische Fotos und deren Restaurierung hat mit dieses Bild von meinem Großvater auf dem Motor angefangen. Seitdem habe ich einiges dazu gelernt, und probiere ich regelmäßig neue Techniken aus, aus dem Buch "DIGITAL RESTORATION From Start to Finish".
Dieses Bild zeigt mein anderer Großvater als Kind (Mitte), seine Eltern (links und rechts) und seine Geschwister (oben). Auf 100% ist gut zu sehen wie gut Kratzer und Flecken zu entfernen sind ohne das Detail verloren geht.
Aus der gleiche Familie ein Bild, welches zeigt das auch Risse gut repariert werden können.
Zum Schluss noch ein Bild vom Vater des Motorfahrers aus dem ersten Bild. Extreme Verblassungen können meistens restauriert werden.
Montag, 16. Mai 2016
Mercury transit - We, the Earth, the Sun, and the planets between us
The first situation symbolizes the Venus transit, and the second the Mercury transit because Venus is much closer to Earth than Mercury. The big difference is that these planets do not walk over a window. They just seem to hang in space and turn around the Sun. They have a little higher velocity, but much shorter paths around the Sun (orbits). This is why they turn in fewer days around the Sun, and we can see them moving across the Sun from time to time. Wow! Imagine Earth, Venus and the Sun 'hanging' in space and turning around each other. The gravity of the Sun is the only thing preventing us from floating away! These transits are a beautiful and visible proof that we, and other planets, turn around the Sun.
Mercury transit 2016 (May 9)
The big spot is a sunspot and stays where it is. The second -very small- dot is Mercury and moves between these three photos that I took during the several hours of the transit from middle left to lower right. Mercury transits occur quite often (13-14 times a century), but due to different angle of the orbit path, it can also pass the earth without moving between us and the sun (higher or lower). The next transits are in 2019 and 2032. Mercury moves with about 50 km/s around the sun in 88 Days (Earth: 30 km/s in 365 days). It is about 60 million km from the Sun (but varying because of an elliptic path) and about 77 million km from Earth . It is also quite small, roughly 5000 km in diameter compared to Earth with 13000 km.
Venus transit 2004 (June 8)
I took this series with my analog equipment in 2004. Venus appears much bigger than Mercury, just like the fly on the window direct in front of you. I was lucky to observe it so nicely! The 2012 Venus transit was badly visible due to clouds and for the next one we have to wait until 2117 and 2125. Venus transits occur in pairs with 8 years distance, because 13 Venus turns around the Sun is almost exactly 8 Earth turns. 8 Years later, they miss each other because Venus is slightly too fast and orbit tracks have a different angle. In the last picture the 'black drop effect' can be seen: Venus and the Sun visually merge together, instead of two circles perfectly laying on top of each other. This effect was long thought to be linked to Venus' atmosphere, but in 2004 so many picture were be taken around the world that this effect is now thought to be caused by irregularities in the earth's atmosphere and by lower quality optics. Remember that the previous transits were in 1874 and in 1882 and the first few picture were taken! Without knowing, one of the photographers back than, Jules Janssen, wrote history by making the first 'movie'. In 1874 he made a series of Venus transit photos on a wheel, just like the first stop-motion pictures with moving animals made by Eadweard Muybridge in 1878. Notice that they were both scientists trying to documents something very accurately.
Venus moves with about 35 km/s around the sun in 225 Days (Earth: 30 km/s in 365 days). It is about 108 million km from the Sun and about 38 million km from Earth (closest distance, at transit). It is just a little smaller than Earth, roughly 12000 km in diameter (Earth: 13000). For who wants to know: Mercury and Venus can transit the sun at the same time, but this happens not so often, the next time is in the year 69163.
Science and transits
The early observations of Venus transits in 1639, 1761, 1769,1874 and 1882 were used to estimate the distance between Earth and Venus and to the Sun (by solar parallax). If you observe the transit from the northern hemisphere and the southern hemisphere (with a known distance between these points), both transits appear slightly moved up and down to each other on the sun, but measuring this vertical shift appeared to be too inaccurate. The following step was to measure the exact time between start and end of the transits, which is shorter when the transit is lower on the sun. This served a more accurate estimation of the distance between both paths. However, the start and end time were still inaccurate because of the 'black drop effect' in the observation.
The Venus transit of 2012 was used to observe how light properties change when a planet moves in front of the sun. This data is useful to improve the search for exoplanets. Exoplanets are mainly found by looking at stars and changes in the light of stars ("a big planet now moves in front of the star").
Viewing
There are only two safe ways to observe this phenomenon yourself; with approved eclipse glasses directly or by projection on a cardboard. Everything else can damage your eyes! Don 't look into the Sun directly! Sunglasses and welding masks are not safe, neither are the combination of eclipse glasses and binoculars.
Photography
For the pictures of Mercury I used my Canon EOS 7D, a Canon EF 75-300 (1:4-5.6 III) Zoom lens and a Kenko Teleplus 1.4x converter, making 420 mm in total. I used cheap Lumifol foil in two layers to darken the sun. This is a kind of reflecting foil which has microscopic holes in it, reducing the light substantially. This foil is not safe for viewing, since it has no additional layer reflecting UV and IR waves. So I never used the viewfinder for viewing during, but used the locked up mirror instead. The result is, despite tripod and locked up mirror, not perfect. At the same time still satisfying.
NASA can do better, of course
https://www.youtube.com/watch?v=AhWMOkrzKzs
Sonntag, 1. Mai 2016
Verbessern von Bienenhotels und Standorte
Diese Frage kommt oft, und letztes Jahr habe ich die wichtigsten Tipps zur Verbesserung von Bienenhotels auf einem A4 zusammengefasst (pdf) können.
Verschiedene Röhrchen
Bambus ist für mich die Nummer 1; robust, viele Jahre haltbar und bei den Wildbienen sehr beliebt. Der Nachteil ist aber das man immer wieder nach der richtige Größe sucht (Lochgröße 3-9 mm), und das sägen per Hand mühsam ist. Tipp beim sägen: Rundum fast durchsägen und dann brechen. Das verhindert das an eine Seite Faden/spitzen entstehen.
Schilf wird häufig eingesetzt weil er einige Vorteile hat: Es gibt immer welche geeignete Lochgrößen und man bekommt mit wenig mühe viel Masse im Bienenhotel. Wichtig ist aber das der Schnitt sauber ist und der Schilf nicht einreißt und zerdrückt wird beim sägen, was man eigentlich nur mit eine sehr scharfe elektrische Säge hinbekommen kann. Auch verwittert Schilf schneller und soll nach 3-4 Jahre ausgetauscht werden.
Japanische Staudenknöterich und Wilde Karde sind sehr leicht in der Umgang per Hand. Einmal ein Messer im Kreis herum ziehen, knacken (einmal mit Sandpapier schliefen) und fertig. Diese Röhrchen sind nicht so robust wie Bambus, aber den Schilf deutlich überlegen.
Pappröhrchen
Dieses Jahr habe ich Pappröhrchen bestellt (bienenhotel.de), die als Nachteil haben das sie komplett offen sind, und so kaum von Wildbienen angenommen werden. Es wird empfohlen diese in einem Schicht Gips hinein zu stecken, so dass die Hinterseite dicht ist. Selber habe ich etwas experimentiert mit der Absicht in der Mitte ein Art von Verschluss zu machen. Vorteil hierbei ist das die Röhrchen jetzt von beide Seiten benutzt werden können, und leichter austauschbar sind.
Hierzu habe ich Stückchen Papier genommen und dieses in stark mit Wasser verdünnter Holzleim getauft, zum Mehrschicht-Dreieck gefaltet und mit einem Stöckchen im Rohr geschoben.
Balkonblumen
Was kann man auf einem kleinen Balkon für Wildbienen tun? Alle Arten von Klee sind beliebt bei vielen Wildbienen und blühen lange. Darum wächst bei mir stinknormaler Rotklee im Balkonkasten. Sehr begeistert bin ich von Steinklee. Vielleicht ist er mit 1 bis 1,5 m etwas zu groß für auf dem Balkon, aber er war den letzten Jahre ein richtiger Bienen-Magnet, der Monatelang geblüht hat und pflegeleicht war. Malven mag ich auch sehr gern, sowie Phacelia und Ringelblumen. Viele andere Tipps finden Sie auf wildbienen.info!
Dienstag, 26. April 2016
Best of 3D - Part 1
Once in a while, you make a discovery that blows you away. I had this recently when I discovered that I could turn many of my macro photos into 3D images (!). The series that I shot often had slightly moved positions giving exactly the left and right eye information that is needed for 3D vision. This is a selection of the moist stunning results so far, - more to come -. You need a red/cyan glasses which comes with almost any 3d print medium. Maybe you still have one? (Those from back in the eighties also work!)
If not, you can simply take a piece of transparent plastic (product packaging, CD case) and a red and green permanent marker and color two fields. Make sure that you hold the red part for your left eye! It is far from perfect but should should you give something between boring flat and "wow-3d".