Posts mit dem Label Photography werden angezeigt. Alle Posts anzeigen

Mittwoch, 27. September 2023

Exposure stacking of a moonlit landscape - a challenge in Photoshop


You may have tried this yourself, trying to photograph a nice landscape with the moon during the twilight hours in the evening or morning. For a landscape like this you need a tripod and a long exposure time. The moon being many times brighter needs a very short exposure time. In cases with such brightness differences you normally make an exposure series as shown here (with tripod!) and use high dynamic range techniques and exposure stacking which is nowadays quite straightforward to use. However with the moon and a bright planet (Mars, or Venus) below the moon this does not work for several reasons:

  • The long exposure gives 'stripes' for the stars, planets and the moon as well, because the earth moves
  • Even more problematic for the same reason is that the moon, stars and palnet change position across the image between exposures
  • The exposure difference is too extreme. Even stacking the cropped moon alone with over 10 images does not yield a nice image

As I will explain here, there is a 'dirty' solution to this problem, which is not as realistic as exposure stacking, but gives a result that is quite true to the experience of the viewer. In short: the washed out moon needs to be cleaned (and not as bright), as well as planets and stars visible as stripes. From the end of the exposure series you copy in a layer and set it to blend mode 'lighten'.

Sonntag, 2. Juli 2023

Advanced Photoshop technique for image restoration: remove erratic backgroud structures


This new Photoshop technique will allow you to remove any erratic, chaotic background patterns, caused by old printing machines ('random dotted pattern') or visible paper structures (fibers, depths), with the least possible blur. Note that there are various methods for recovering halftone prints from newspapers or color magazines (with the fast fourier transformation method) covered elsewhere. The images have in common that they show at the highest zoom a kind of chaotic leopard pattern. What you would like to do is to lighten the spots, and darken the background, so that they merge to a uniform color. The difficulty is to get a selection that is exactly right.

Montag, 1. März 2021

Amazing photos of melting glaciers and mountain summits in the Italian Alps


This church in Trafoi is still standing. The big hotel in the back had a fire and wasn't rebuilt. But what is really missing in the background is the big glacier!
Left image: SLUB / Deutsche Fotothek / Möbius, Walter; Right image: J. Everaars

When I visited the Italian Alps for a scientific project on the effect of climate and land use change on pollinators, I tried to re-picture some of the sites I found on historical photos. Here are some of the results. 

Sonntag, 20. Dezember 2020

Photoshop filters for noise, color and sharpness

Free and commercial solutions compared for scanned negative film

The challenge
 
I have scanned a series of old negatives with my Epson Perfection V600 Photo. Even when the scans are of high quality, the scans have a few problems, which are
A. Film grain
B. Poor color
C. Focus problems
Now I like to compare free and commercial solutions to see whether the money could be worth the investment in terms of time saving and unparalleled results.

Sonntag, 3. März 2019

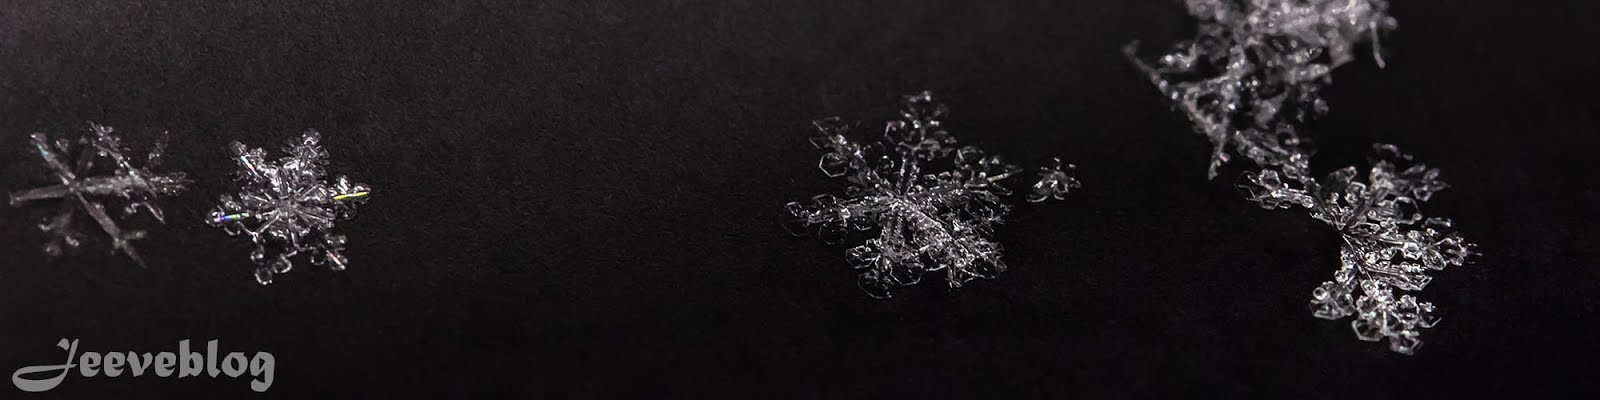
Snowflakes


Winter snow. A few weeks ago there was one of these not so common winter days; single well-developed snowflakes were falling from the sky, one by one, touching a snow-free surface.
My photographers hart started beating faster - this was a long awaited moment to make a series on snowflakes. A professional would have a prepared piece of black material (matted plastic) in the freezer waiting for this occasion. You need a very cold dark surface where the single snowflakes can land on. Now, I do not have a big freezer, so I have a different secret. I used black bicycle saddles, sufficiently available in our backyard. Further I used a Tamron macrolens (SP AF 60mm F/2.0 Di II Macro 1:1) and LED ringlight and some patience in Photoshop to clean up dirt from the saddles and increase contrast.
Enjoy.


Sonntag, 4. Juni 2017

The search for the European Stalk-eyed Fly


Stalk-eyed Fly, Achias sp., male (Australia)

Stalk-eyed flies (Diopsidae) are fascinating insects. Males have their eyes on long stalks and the longer the stalks, the more attractive they are for females. It is quite unpractical to have such 'long eyes' and it is thought that when you can deal with such unpractical eyes, you must be quite healthy and therefore you are attractive when you have longer eyes (handicap principle).
When I heard that an European member of this fly family, Sphyracephala europaea, lives in Hungary and we had plans to visit Hungary on a future holiday anyway, I decided to go and search for it.

There is not much know about this species, because only few people had the luck to find one in the 20 years after it's discovery in 1996. The original article (Papp 1997) and the key to the European fly families by Oosterbroek, as well as several blogs reporting about a lucky find (here and here), do give some basic information.


Sphyracephala europaea lives along waters at shadow-rich places often occurring in large numbers together. These small flies (4 mm) seem to prefer the direct shore of the river. Flies were found from September to November, but also in June. The pictures in the blogs give an additional feel of the habitat of the fly.

We stayed a few days in Mako, south east of Szeged, so that I could search along the river Mures, which s known as one of the places where this fly can be found.

The fluvial forest that I could see from the campsite looks very promising for finding S. europaea or some other rare species. The challenge is to find some open spots, where I can reach the river bank and optimally find some flat shore to search.

The first day after arrival, we decided to rent a bike and get us a decent map of the environment. It is generally the best option to get a local map with detailed bike and hike tracks; the most recent maps are normally sold locally. The alternative with google maps, was not an option anymore, since the internet connection at the campsite was dead. The bike rental worked out well, at a hotel nearby. Arriving at the tourist office, people were very happy with us. Mako has been made more accessible for tourists the past years, with an official tourist office, but apparently hardly tourists. They tried to sell us postcards of Mako. Unfortunately they did not have a detailed map, only road maps just as detailed we already had, not sufficient to identify good places to look for S. europae ... The local bookstore had more maps but not more detailed, and a large pile of the, apparently single type, postcard of Mako.

We set of for a bike trip along the north side of the river. It was an interesting trip over the river dike and enjoying the countryside. Only occasionally there were places where I could reach the shore. Mostly it was without a sandy shore, with the land abruptly ending with a meter downward into the water. It was hard to look for insects here. And as it may not surprise, I was not successful.

The second day, I decided to try the other (south) side of the river. I found a place with a small path only a few meters from the shore, probably for people going fishing.


A place being ecologically very interesting, with many old trees, occasionally flooded and with dense vegetation.


This fluvial forest 'looks like a jungle'.

Soon, I started to see flies. Flies of all sorts...

This is a Black scavenger fly (Sepsidae)


A Stiletto fly (Therevidae)


This could be a Sapromyza sp. (Lauxaniidae) or a Marsh fly (Sciomyzidae)


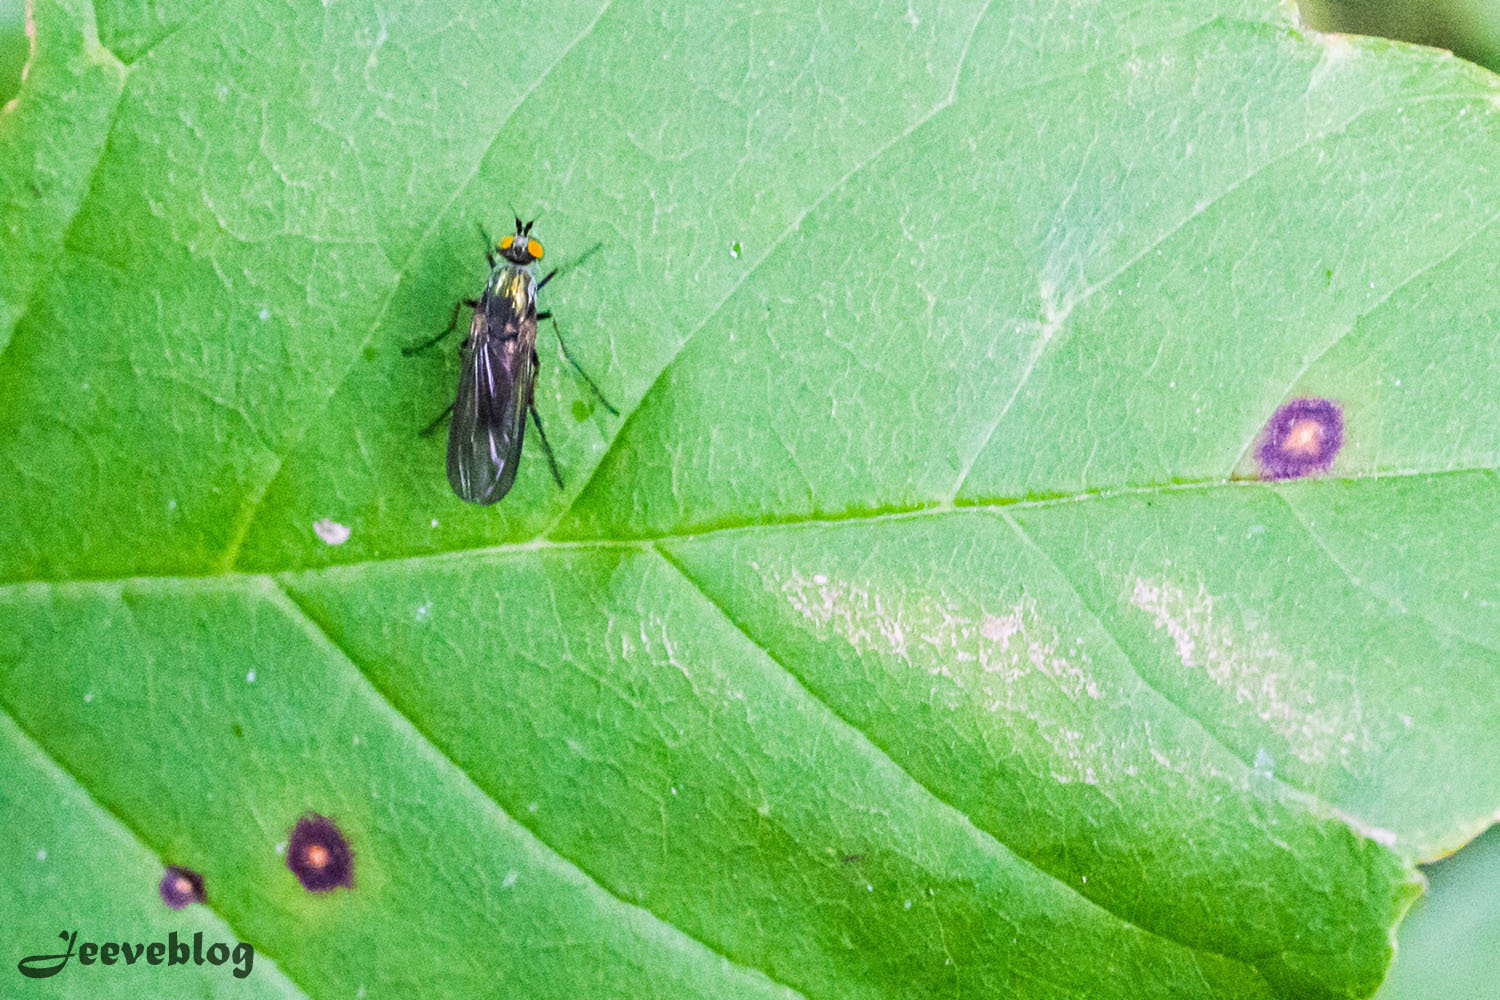
Probably a Snipe fly (Rhagionidae)


Very hard to tell, a Lance fly (Lonchaeidae)?, a Scuttle fly (Citrago sp., Phoridae)? or Cacoxenus indagator (Drosophildae)?


A Long-legged fly (Dolichopodidae) or a Stretched-foot fly (Tanypezidae)?


These thick long antenna are often indicating that these are Thick-headed flies (Conopidae), but probably these are 'Parasite flies' such as Cylindromyia bicolor (Tachinidae), indicated by the stiff hairs on the body and the red coloring.


A Robber fly (Asilidae), easily recognizable by the deep valley between the eyes.


With >5 cm too large to be a fly. It is an adult of another rarely seen insect group, Antlions (Myrmeleontidae), belonging to the insect order of net-winged insects (Neuroptera); adults are occasionally seen close to river shores, while funnels made by larvae are more commonly seen.


A Scorpion fly (Panorpidae). Not a fly (Diptera) at all, but belonging to the insect order Mecoptera.
Long antenna, long snout and a scorpion tail!

Unfortunately still no sign of a stalk-eyed fly ...


Near the campsite there was a small patch of sandy shore which may be the better habitat.


The first insect I found was a Pygmy mole cricket (Tridactylidae).


This is Xya variegata, known from the Mures river banks. Quite nice!


And what is this?


This may be a shore bug, Saldula sp.


Finally, a small fly!


closer... This patterning is typical for the Genus Anthomyia in the family Root-maggot flies (Anthomyiidae).


Another small fly!

Is this the rare Leiomyza dudai the family Asteiidae, as Walter reports in his blog? Or maybe it is ....


Unfortunately, this day I still found no sign of a stalk eyed fly.


On the third day, we had to leave for our home trip. On the way back, we decided to stop near the river bank of the Mures river, but it was difficult to see on our road map where to stop the car. Our attempt to get close, resulted in a forest hike, that ended 50-100 metres from the river bank, with too dense shrubs to get trough. It was the end of the search.

Alleviating the disappointment, I found this beautiful butterfly:

The common glider - Neptis sappho


And finally, I also could make an acceptable photo of a dragonfly in flight!


I left for home, not with empty hands, but with a sight of the stalk-eyed fly neither. It was a pity, but I did my best. Home again, I finally could do a decent google map investigation with a lot of zooming. I found many additional places that would have been suitable to search! That was a bit depressing conclusion, but I never would have prepared on forehand a map so detailed as would haven been required for this... And to be honest, with probably the main flight period in September to November, I may had been unsuccessful anyway in finding this fly. It was an interesting quest for a fly with many interesting discoveries on the way!
(The fly at the startz


Sonntag, 13. November 2016

Macro photography in millimeter range: microscope vs DSLR camera

In this small review I compare two imaging methods, the VHX2000 microscope and a Canon EOS 7D camera with a reverse ring, for an object of a few mm in size.


This motive, a 30 million year old ant trapped in Baltic amber, is about 3 by 4 mm. Wit a normal macro lens or extension tubes, it is not possible to get such a small object so detailed captured. Reversing a wide angle (zoom) lens with an adapter (reverse ring or retro adapter) gives high magnifications and it is possible to get a good picture (right two images). I also had the opportunity to use a microscope with camera, the VHX2000 from Keyence, which is specially built for imaging small objects. I found that both are not perfect solutions, which makes a comparison meaningful.

Before I get to the differences, some words on what they have in common. Both work with lenses and a digital sensor. The depth of field is very limited and both require a stack of 10-20 images from bottom to top that are either merged in a stacking program like CombineZP or Photoshop*. They both disappoint in image quality and detail for printing on a A3 format. For more detail you need to zoom in and make a mosaic composite**. The ant image is based on a single stack image.

VHX2000 DSLR
Stability
Stable platform present Need to stabilize camera and object carefully
Image Quality
1600 x 1200 (3200 x 2400) pixel resolution 5184 x 3456 pixel resolution
Compressed/filtered data Raw data
Crisp sharpness difficult Crisp sharpness difficult
Details such as hairs visible Details such as hairs visible
Photo stacks by software Photo stacks manually
Optimal stacking


Non-optimal stacking
(movement of camera possible when turning wheel)
Light
Artificial light Natural and artificial light possible
Light from all sides (adjustable) Light from one side (with natural light)
Light can work 'flat' Lighting very flexible in giving depth
Clipping of light areas Fewer clipping areas (with Raw data)
Other
Zoom under 1 mm possible Zoom limited (here to about 2 mm objects)
Relatively fast Time consuming
Expensive Not expensive, when camera and lens are already in possession

Conclusion:
The pictures with either a VHX2000 or a reverse ring are slightly different, especially concerning color. The reverse ring method is more complicated and time consuming but gives an image quality that can keep up with a microscope image (apart from small lens distortions that are not considered here). For the price and quality, a reverse ring is a very attractive alternative to a microscope, when the object is not smaller than about 2 mm.

* On digital stacking:
1) CombineZP (freeware for stacking) gives nice results with the pyramid weighted average method. The idea is that the software reconstructs the 3d depth of the object. From the bottom layer, the sharpest is considered and build up to the top layer with complex algorithms.
2) Photoshop can also yield nice results with a different method. It just keeps the most sharp part from each layer. Sometimes the result is nicer than CombineZP, sometimes not. To do this, choose File => Scripts => Load files into stack. In the layer palette, select all layers. Then choose: Edit => Auto-Align Layers, followed by Edit => Auto-Blend Layers. Sometimes the result is better without Auto-Align (eventually manual align).

** Mosaic composite:
E.g. a mosaic of 6 image columns by 6 image rows with overlap in area for stitching gives at most 3 times more detail. With 20 stack layers per image, you need to manage 36x20=720 images (which I only did once). First you stack each mosaic part with the favored software, after which the mosaic is stitched together. This is time consuming because it often requires manual adjustments, and is only justified when an image is indeed to be presented at A3 format.

Mittwoch, 12. Oktober 2016

Free desktop backgrounds


A small present from Naturemoods.com, a package of backgrounds for you computer in the formats 1920x1080, 1280x800, 1366x768 and 1024x768. Download HERE.


A smaller fit can be elegant, supply a better overview of your icons and save energy with a black background.

How to use (Windows 10):
- Open the downloaded zip
- Copy the folder Backgrounds1 to "Pictures" (This PC)
- Go to your desktop and right-click on an empty spot, and choose "Personalize"
- Here you can set Background to "Picture".
- Important: Set "Choose a fit" to "Center" first! (Backgrounds are not made to stretch, span, etc.!)
- Click on "Browse" to choose you picture. Navigate to the folder Backgrounds1 in Pictures where you have put it.
- Now you can try different backgrounds to find out what your favorite is, in the size of your desktop. You can choose one that fits your background, but you can also choose a smaller one (as above in the example) when you wish.
- If you are done and still in the settings window, you see a list on the left. "Background" first and "Lock screen" as third. Go there, and select a picture here as well. You can also set "Show lock screen background picture on the sign-in screen" to ON.

Rainbows and butterflies in dutch agricultural landscapes - 30 years ago


Rainbow


Aglais Io - The European Peacock
on Lythrum salicaria - Purple loosestrife


Along ditches: purple loosestrife, nettles, and other plants preferring nutrient-rich soils


Along the maize monocultures; quite some diversity, including Anthriscus sylvestris - Wild chervil.

--------------------------

These pictures were my very first, when I started photography. Now they are a time document from about 1988, almost 30 years ago.
Yes, it seemed so idyllic when I grew up. Some biodiversity between the agricultural fields; different weeds and at least 5 different butterflies flying regularly around each year. At that time I did not know the truth. Decades of fertilizer already destroyed most of the biodiversity. These were the species remaining! But it was the world I knew (my 'zero' reference). And it would become worse soon... New pesticides were being used and by 1992 the purple loosestrife disappeared completely from this area where I lived, along with the butterflies and bees visiting them. For who is not depressed enough: This happened AFTER 1992.

This change that I observed was definitely one of the reasons to dedicate a part of my life to nature conservation in agricultural landscapes. It seems I have to continue for a while...


---------------------


Sonntag, 12. Juni 2016

Historical image restoration - Reparatur von alte Bilder


Ich habe meine Seite mit der digitale Restaurierung alter Bilder erneuert und eine Liste mit Reparatur-Dienstleistungen hinzugefügt.


Mein Interesse für historische Fotos und deren Restaurierung hat mit dieses Bild von meinem Großvater auf dem Motor angefangen. Seitdem habe ich einiges dazu gelernt, und probiere ich regelmäßig neue Techniken aus, aus dem Buch "DIGITAL RESTORATION From Start to Finish".


Dieses Bild zeigt mein anderer Großvater als Kind (Mitte), seine Eltern (links und rechts) und seine Geschwister (oben). Auf 100% ist gut zu sehen wie gut Kratzer und Flecken zu entfernen sind ohne das Detail verloren geht.

 
Aus der gleiche Familie ein Bild, welches zeigt das auch Risse gut repariert werden können.


Zum Schluss noch ein Bild vom Vater des Motorfahrers aus dem ersten Bild. Extreme Verblassungen können meistens restauriert werden.

Montag, 16. Mai 2016

Mercury transit - We, the Earth, the Sun, and the planets between us

Imagine that you are waiting in your car for someone, and suddenly a fly walks over the front window. You see the fly, but also a building in the background. It seems like a giant fly that is walking over this building with doors and windows. You imagine that? We could call this a 'fly transit'. Now imagine that the front window is 5 meters away from you. You still see the fly walking over the building but it looks pretty small.
The first situation symbolizes the Venus transit, and the second the Mercury transit because Venus is much closer to Earth than Mercury. The big difference is that these planets do not walk over a window. They just seem to hang in space and turn around the Sun. They have a little higher velocity, but much shorter paths around the Sun (orbits). This is why they turn in fewer days around the Sun, and we can see them moving across the Sun from time to time. Wow! Imagine Earth, Venus and the Sun 'hanging' in space and turning around each other. The gravity of the Sun is the only thing preventing us from floating away! These transits are a beautiful and visible proof that we, and other planets, turn around the Sun.


Mercury transit 2016 (May 9)
The big spot is a sunspot and stays where it is. The second -very small- dot is Mercury and moves between these three photos that I took during the several hours of the transit from middle left to lower right. Mercury transits occur quite often (13-14 times a century), but due to different angle of the orbit path, it can also pass the earth without moving between us and the sun (higher or lower). The next transits are in 2019 and 2032. Mercury moves with about 50 km/s around the sun in 88 Days (Earth: 30 km/s in 365 days). It is about 60 million km from the Sun (but varying because of an elliptic path) and about 77 million km from Earth . It is also quite small, roughly 5000 km in diameter compared to Earth with 13000 km.


Venus transit 2004 (June 8)
I took this series with my analog equipment in 2004. Venus appears much bigger than Mercury, just like the fly on the window direct in front of you. I was lucky to observe it so nicely! The 2012 Venus transit was badly visible due to clouds and for the next one we have to wait until 2117 and 2125. Venus transits occur in pairs with 8 years distance, because 13 Venus turns around the Sun is almost exactly 8 Earth turns. 8 Years later, they miss each other because Venus is slightly too fast and orbit tracks have a different angle. In the last picture the 'black drop effect' can be seen: Venus and the Sun visually merge together, instead of two circles perfectly laying on top of each other. This effect was long thought to be linked to Venus' atmosphere, but in 2004 so many picture were be taken around the world that this effect is now thought to be caused by irregularities in the earth's atmosphere and by lower quality optics. Remember that the previous transits were in 1874 and in 1882 and the first few picture were taken! Without knowing, one of the photographers back than, Jules Janssen, wrote history by making the first 'movie'. In 1874 he made a series of Venus transit photos on a wheel, just like the first stop-motion pictures with moving animals made by Eadweard Muybridge in 1878. Notice that they were both scientists trying to documents something very accurately.
Venus moves with about 35 km/s around the sun in 225 Days (Earth: 30 km/s in 365 days). It is about 108 million km from the Sun and about 38 million km from Earth (closest distance, at transit). It is just a little smaller than Earth, roughly 12000 km in diameter (Earth: 13000). For who wants to know: Mercury and Venus can transit the sun at the same time, but this happens not so often, the next time is in the year 69163.

Science and transits
The early observations of Venus transits in 1639, 1761, 1769,1874 and 1882 were used to estimate the distance between Earth and Venus and to the Sun (by solar parallax). If you observe the transit from the northern hemisphere and the southern hemisphere (with a known distance between these points), both transits appear slightly moved up and down to each other on the sun, but measuring this vertical shift appeared to be too inaccurate. The following step was to measure the exact time between start and end of the transits, which is shorter when the transit is lower on the sun. This served a more accurate estimation of the distance between both paths. However, the start and end time were still inaccurate because of the 'black drop effect' in the observation.
The Venus transit of 2012 was used to observe how light properties change when a planet moves in front of the sun. This data is useful to improve the search for exoplanets. Exoplanets are mainly found by looking at stars and changes in the light of stars ("a big planet now moves in front of the star").


Viewing
There are only two safe ways to observe this phenomenon yourself; with approved eclipse glasses directly or by projection on a cardboard. Everything else can damage your eyes! Don 't look into the Sun directly! Sunglasses and welding masks are not safe, neither are the combination of eclipse glasses and binoculars.

Photography
For the pictures of Mercury I used my Canon EOS 7D, a Canon EF 75-300 (1:4-5.6 III) Zoom lens and a Kenko Teleplus 1.4x converter, making 420 mm in total. I used cheap Lumifol foil in two layers to darken the sun. This is a kind of reflecting foil which has microscopic holes in it, reducing the light substantially. This foil is not safe for viewing, since it has no additional layer reflecting UV and IR waves. So I never used the viewfinder for viewing during, but used the locked up mirror instead. The result is, despite tripod and locked up mirror, not perfect. At the same time still satisfying.
NASA can do better, of course
https://www.youtube.com/watch?v=AhWMOkrzKzs

Dienstag, 26. April 2016

Best of 3D - Part 1


Once in a while, you make a discovery that blows you away. I had this recently when I discovered that I could turn many of my macro photos into 3D images (!). The series that I shot often had slightly moved positions giving exactly the left and right eye information that is needed for 3D vision. This is a selection of the moist stunning results so far, - more to come -. You need a red/cyan glasses which comes with almost any 3d print medium. Maybe you still have one? (Those from back in the eighties also work!)


If not, you can simply take a piece of transparent plastic (product packaging, CD case) and a red and green permanent marker and color two fields. Make sure that you hold the red part for your left eye! It is far from perfect but should should you give something between boring flat and "wow-3d".

                                Romanesco broccoli

                                Clouds

                                Bolete, probably porcino

 
                                Muskroot (Adoxa moschatellina) 

                                Tinder fungus

                                Slime mould 

                                Slime mould close-up