Mittwoch, 11. Oktober 2017
A poster with common wild bees in gardens
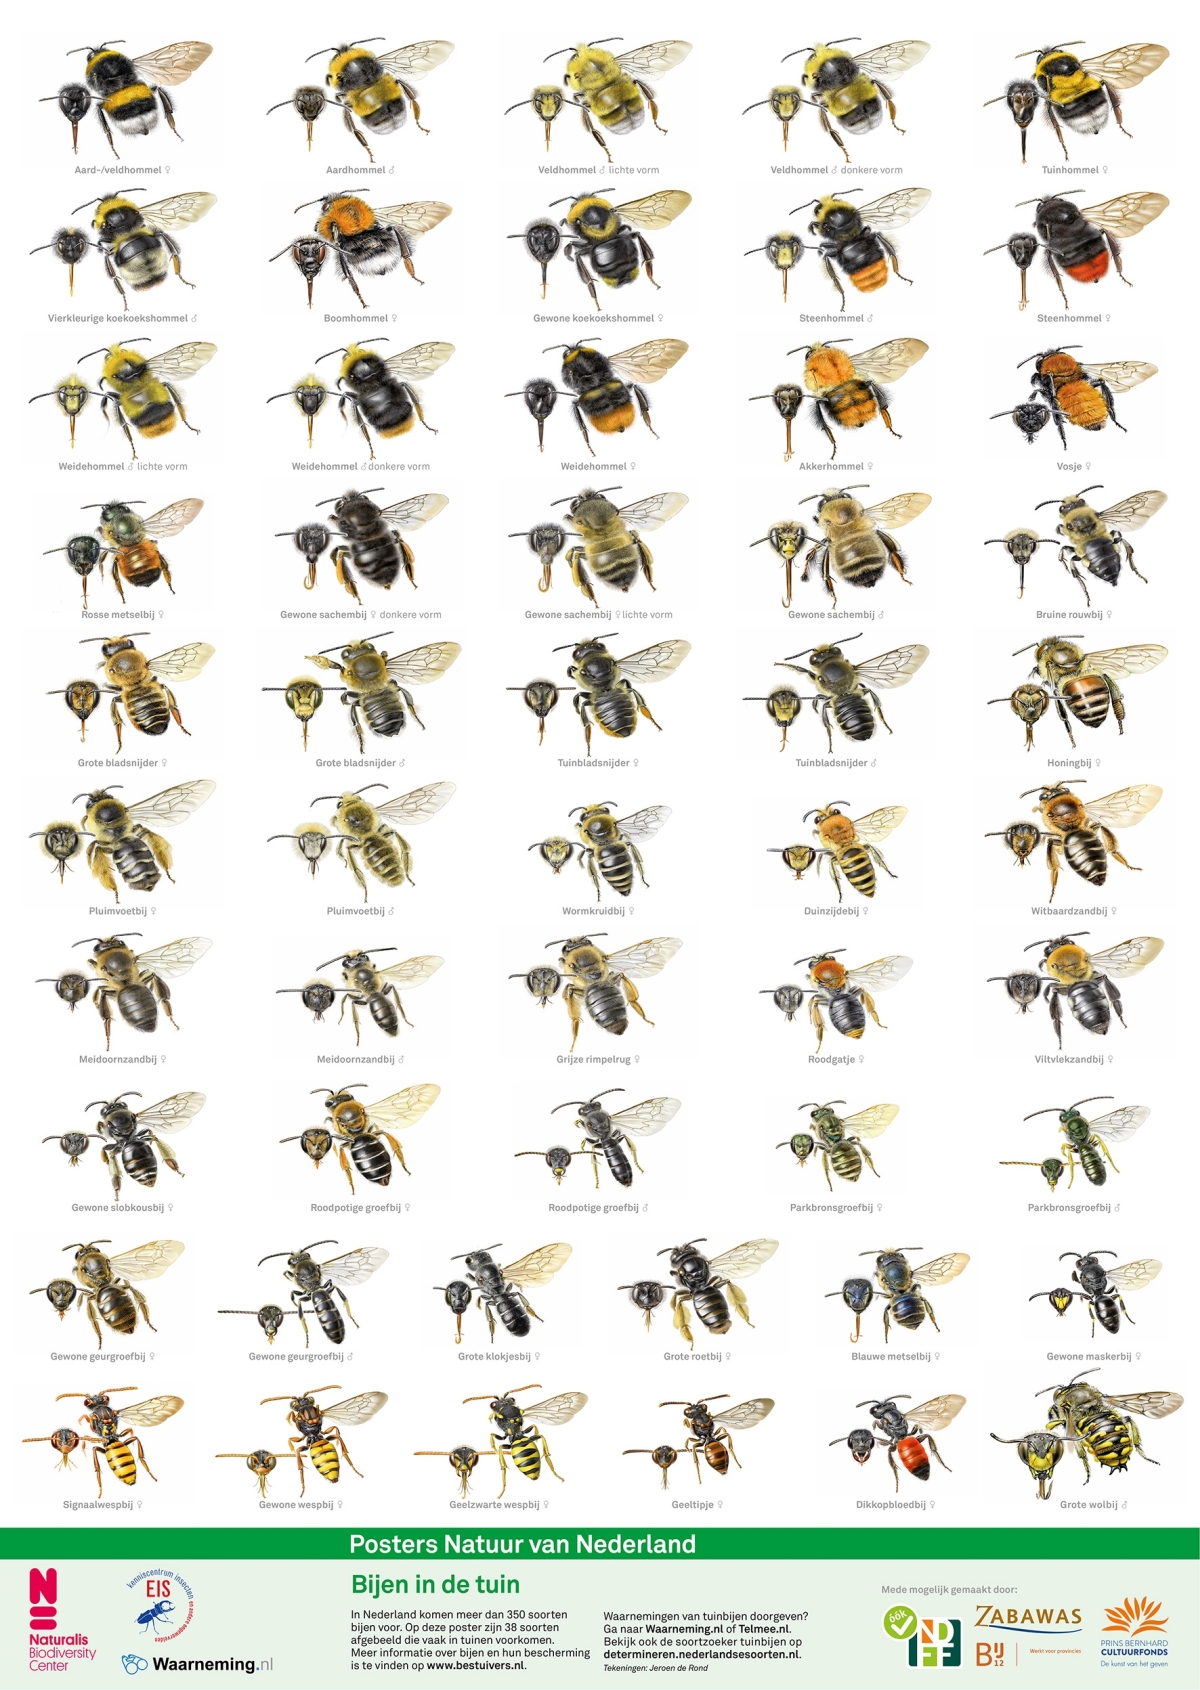
In my office I have a wonderful poster of common bees in dutch gardens, with excellent illustrations by Jeroen de Rond, distributed by Naturalis and EIS for free (link). Unfortunately, the poster has only dutch bee names, though I am more familiar with the scientific names. Also, my English- and German-speaking colleagues would love to know the names in their language! Hence, I put myself to the task to make a translation, resulting in this table, that you can put next to the poster to have all the different names. The common names are retrieved from "Field Guide to the Bees of Great Britain and Ireland" by Falk (2015) and "Taschenlexikon der Wildbienen Mitteleuropas" by Scheuchl & Willner (2016).
Extending to this, EIS provides a low quality A4 pdf of this poster (link). I thought it would be nice to add the scientific names to the Dutch version, so people can learn them. And, fortunately, it was a small effort to replace the dutch names for English or German names. So here is the result (with credit to EIS and Naturalis as original producers of this Poster):
Bees of Gardens - Dutch
Bees of Gardens - English
Bees of Gardens - German
Enjoy!
Sonntag, 4. Juni 2017
The search for the European Stalk-eyed Fly

Stalk-eyed Fly, Achias sp., male (Australia)
Stalk-eyed flies (Diopsidae) are fascinating insects. Males have their eyes on long stalks and the longer the stalks, the more attractive they are for females. It is quite unpractical to have such 'long eyes' and it is thought that when you can deal with such unpractical eyes, you must be quite healthy and therefore you are attractive when you have longer eyes (handicap principle).
When I heard that an European member of this fly family, Sphyracephala europaea, lives in Hungary and we had plans to visit Hungary on a future holiday anyway, I decided to go and search for it.
There is not much know about this species, because only few people had the luck to find one in the 20 years after it's discovery in 1996. The original article (Papp 1997) and the key to the European fly families by Oosterbroek, as well as several blogs reporting about a lucky find (here and here), do give some basic information.
Sphyracephala europaea lives along waters at shadow-rich places often occurring in large numbers together. These small flies (4 mm) seem to prefer the direct shore of the river. Flies were found from September to November, but also in June. The pictures in the blogs give an additional feel of the habitat of the fly.
We stayed a few days in Mako, south east of Szeged, so that I could search along the river Mures, which s known as one of the places where this fly can be found.
The fluvial forest that I could see from the campsite looks very promising for finding S. europaea or some other rare species. The challenge is to find some open spots, where I can reach the river bank and optimally find some flat shore to search.The first day after arrival, we decided to rent a bike and get us a decent map of the environment. It is generally the best option to get a local map with detailed bike and hike tracks; the most recent maps are normally sold locally. The alternative with google maps, was not an option anymore, since the internet connection at the campsite was dead. The bike rental worked out well, at a hotel nearby. Arriving at the tourist office, people were very happy with us. Mako has been made more accessible for tourists the past years, with an official tourist office, but apparently hardly tourists. They tried to sell us postcards of Mako. Unfortunately they did not have a detailed map, only road maps just as detailed we already had, not sufficient to identify good places to look for S. europae ... The local bookstore had more maps but not more detailed, and a large pile of the, apparently single type, postcard of Mako.
We set of for a bike trip along the north side of the river. It was an interesting trip over the river dike and enjoying the countryside. Only occasionally there were places where I could reach the shore. Mostly it was without a sandy shore, with the land abruptly ending with a meter downward into the water. It was hard to look for insects here. And as it may not surprise, I was not successful.
The second day, I decided to try the other (south) side of the river. I found a place with a small path only a few meters from the shore, probably for people going fishing.
A place being ecologically very interesting, with many old trees, occasionally flooded and with dense vegetation.

This fluvial forest 'looks like a jungle'.
Soon, I started to see flies. Flies of all sorts...
This is a Black scavenger fly (Sepsidae)
A Stiletto fly (Therevidae)

This could be a Sapromyza sp. (Lauxaniidae) or a Marsh fly (Sciomyzidae)
Probably a Snipe fly (Rhagionidae)
Very hard to tell, a Lance fly (Lonchaeidae)?, a Scuttle fly (Citrago sp., Phoridae)? or Cacoxenus indagator (Drosophildae)?
A Long-legged fly (Dolichopodidae) or a Stretched-foot fly (Tanypezidae)?
These thick long antenna are often indicating that these are Thick-headed flies (Conopidae), but probably these are 'Parasite flies' such as Cylindromyia bicolor (Tachinidae), indicated by the stiff hairs on the body and the red coloring.
A Robber fly (Asilidae), easily recognizable by the deep valley between the eyes.
With >5 cm too large to be a fly. It is an adult of another rarely seen insect group, Antlions (Myrmeleontidae), belonging to the insect order of net-winged insects (Neuroptera); adults are occasionally seen close to river shores, while funnels made by larvae are more commonly seen.

A Scorpion fly (Panorpidae). Not a fly (Diptera) at all, but belonging to the insect order Mecoptera.
Long antenna, long snout and a scorpion tail!
Unfortunately still no sign of a stalk-eyed fly ...
Near the campsite there was a small patch of sandy shore which may be the better habitat.

The first insect I found was a Pygmy mole cricket (Tridactylidae).

This is Xya variegata, known from the Mures river banks. Quite nice!
And what is this?

This may be a shore bug, Saldula sp.

Finally, a small fly!

closer... This patterning is typical for the Genus Anthomyia in the family Root-maggot flies (Anthomyiidae).

Another small fly!
Is this the rare Leiomyza dudai the family Asteiidae, as Walter reports in his blog? Or maybe it is ....Unfortunately, this day I still found no sign of a stalk eyed fly.
On the third day, we had to leave for our home trip. On the way back, we decided to stop near the river bank of the Mures river, but it was difficult to see on our road map where to stop the car. Our attempt to get close, resulted in a forest hike, that ended 50-100 metres from the river bank, with too dense shrubs to get trough. It was the end of the search.
Alleviating the disappointment, I found this beautiful butterfly:

The common glider - Neptis sappho

And finally, I also could make an acceptable photo of a dragonfly in flight!
I left for home, not with empty hands, but with a sight of the stalk-eyed fly neither. It was a pity, but I did my best. Home again, I finally could do a decent google map investigation with a lot of zooming. I found many additional places that would have been suitable to search! That was a bit depressing conclusion, but I never would have prepared on forehand a map so detailed as would haven been required for this... And to be honest, with probably the main flight period in September to November, I may had been unsuccessful anyway in finding this fly. It was an interesting quest for a fly with many interesting discoveries on the way!
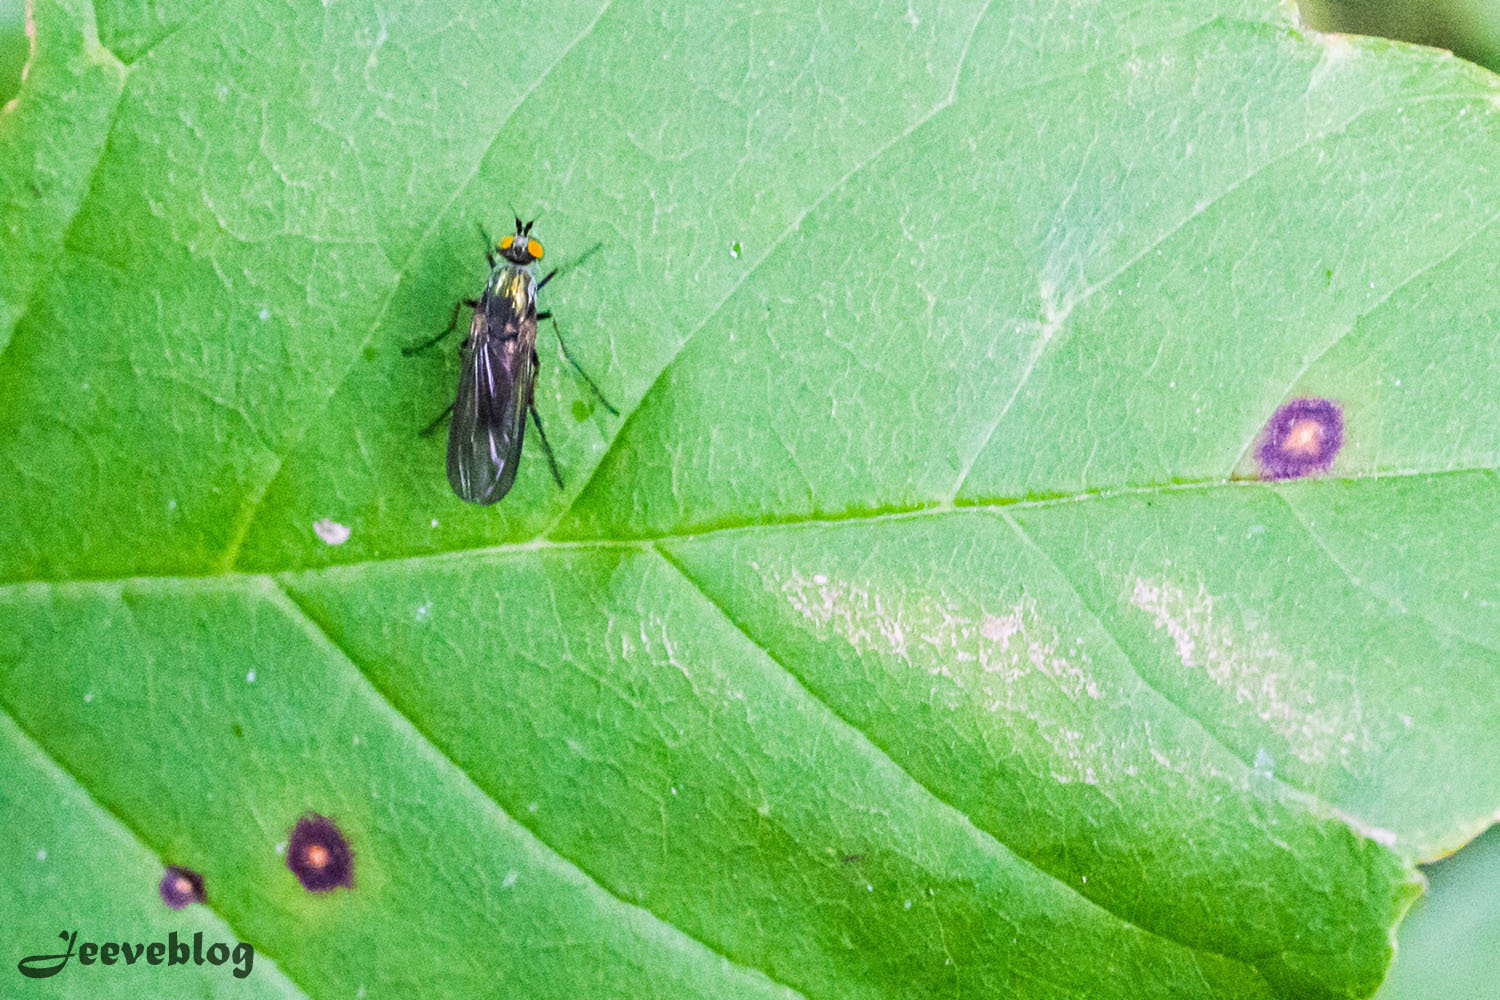
(The fly at the startz
Donnerstag, 23. März 2017
Kaffeesatz: Wie man Abfall zu Austernpilze aufwerten kann!
Selber züchten von Pilze macht Spaß. Dafür gibt es viele Fertig-Sets wobei man mit wenig Aufwand eine schöne Ernte hat (unbedingt probieren!). Als ich erfahren habe dass Pilze auch auf eigene Abfälle gezogen werden können, wollte ich das ausprobieren. Man kann sehr gut Austernpilze auf Kaffeesatz züchten, und davon haben wir genug Da es im Internet (siehe unten) verschiedene teils konträre Empfehlungen gibt, erläutere ich wie es bei mir am besten funktioniert hat:

Als Behälter habe ich Joghurtbecher (> 1 L) benutzt. Weil das lebende Material atmen können muss, habe ich an der Seite und im Deckel Löcher ausgeschnitten und diese mit atmendes Klebeband (medizinisches Klebeband) abgedeckt. Die Becher werden direkt vor der Benutzung nochmal mit kochendem Wasser sterilisiert.
Als erste braucht man Austernpilz-Pilzbrut das man zum Beispiel im Internet kauft, oder von Freunde bekommt. Diese Brut zerbröckele ich in 1 cm Bröckchen die ich Schichtweise mit Kaffeesatz im Joghurtbecherfülle. Es ist ganz einfach; nach gemachte Kaffee der Kaffesatz im Becher leeren bis ein dünner Schicht da ist. Dann ein Schicht Pilzbrut gut verteilen, und der Rest des Pilzbrutes wieder im Kühlschrank stellen. Nach dem nächsten Kaffee-trinken das Pilzbrut mit Kaffeesatz bedecken. Wenn es Bedeckt wieder ein Schicht Pilzbrut, und so weiter. Minimal ein Drittel soll Pilzbrut sein. Wichtig ist das man den Kaffeesatz in den Stunden nach den Kaeffebrühen verwertet (und auf keinem Fall am nächsten Tag), weil sonst zu viele Fremdpilze im nassen Satz schon anfangen zu wachsen (wenn der Kaffeesatz direkt mit Austernpilzbrut bedeckt ist, kann dieser den Konkurrenz gewinnen).
Jede Woche habe ich Wasser gekocht (steril) und in einem Pflanzensprüher gefüllt und es damit immer wieder angefeuchtet (nach dem Kochen zuerst abkühlen lassen!).
Irgendwann ist der Joghurtbecher voll und bei optimalen Wachstumsbedingungen sieht es dann nach 2 bis 4 Wochen so aus; fertig für die nächste Phase. Optimal war bei 18-20°C in der Wohnung. Der Wachstum im Abstellkammer und Keller bei niedrigere Temperaturen war zu langsam, und dadurch konnten andere Pilze eindringen. Falls das auch mal bei 20°C passiert, trotz aller sterilen Maßnahmen, dann versuchen die Stelle zo schnell wie möglich weg zu schneiden. Alles was nicht diese schöne weißen Farbe hat, gehört nicht drin! Grau und grün sind ganz böse, und können das Ende des Experiments sein!
Die nächste Phase dient der Pilzwachstum. Der weiße Klumpen aus dem Joghurtbecher wird in einem anderen Behälter gebracht wo es feucht bleiben kann, aber die Pilze auch genug Platz zum wachsen haben. Als Behälter habe ich einen Torten-Transportbox benutzt, aber was anderes geht auch. Wichtig ist das es genug Zugluft geben kann! Deshalb habe ich immer, wie auf dem Bild, den Deckel etwas aufgelassen. Gleichzeitig brauchen die Pilze Feuchte zum wachsen und dürfen nicht austrocknen! Ich habe die jeden morgen mit Wassernebel angesprüht, besser wäre vielleicht noch 3x täglich. Der optimale Temperatur für diese Phase scheint 10-20°C zu sein. Bei mir war das draußen an einem schattigen Ort. Unser Keller hatte leider zu viele Fremdkeime, und hat immer zu Verderb geführt. Bei einem sauberen Keller könnten theoretisch die Bedingungen das ganze Jahr optimal sein.
Nach nochmal 2-4 Wochen sind dann die Pilze da!
Tipp: rechtzeitig ernten! Austernpilze sind relative empfindlich und können am nächsten Tag vertrocknet, oder das Gegenteil, angeschimmelt sein. Die auf dem Bild sind auf jedem Fall Erntereif! Guten Appetit!
Und das Beste von Allem kommt noch; wenn die Ernte vorbei ist, kann man den weißen Klumpen wieder als Brut für die nächste Serie benutzen!
Ich hatte immer 2-3 Joghurteimer Parallel laufen (soviel bekommt man auch aus dem Anfangsbrut) und viel Spaß daran gehabt. Doch nach allen Experimente mit verschiedenen Bedingungen habe ich nach einem Jahr aufgeben müssen. Aber es hat geschmeckt!
Kurzgefasst:
- Substrat immer feucht halten
- immer atmen lassen, und in der zweite Phase Luftzug zulassen
- Temperaturen von über 25°C und direkte Sonneneinstrahlung verhindern
- rechtzeitig ernten
Zum Schluss noch ein paar Sachen die nicht funktioniert haben:
- Beimischen von Holzspäne/Sägemehl. Übergossen mit kochendem Wasser war es zwar sterilisiert, aber das Lignin im Holz (oder was anderes im Holz) nicht weit genug vorbereitet um den Pilz zu ernähren. Das Pilz-Mycel wollte nur im Kaffeesatz wachsen, und das Holzmehl ist am Ende vergammelt gewesen.
- Kein Zugluft in der zweite Phase führte immer zu kleine Pilze die danach direkt vergammelten.
- Im Sommer draußen. Es war einfach zu warm, und Pilze trockneten zu schnell aus! Ein kompletter Joghurtbecher hat den ganzen Sommer (4-5 Monate) bei mir im Kühlschrank gestanden und im Herbst wieder Pilze gegeben. Das hat funktioniert!
Viel Erfolg!
Weitere Weblinks:
http://www.tintling.com/inhalt/1997/Austernseitling.pdf
Open Source Anleitung zur Pilzzucht auf Kaffeesatz
http://de.wikihow.com/Drinnen-Pilze-z%C3%BCchten
http://www.pilzzuchtshop.de/anleitung3.php?mode=ext
http://www.pilzpaket.de/pilzzucht-blumentopf-experiment/
http://archiv.alessandrohaas.de/pilzzucht-auf-kaffeesatz/
Freitag, 17. März 2017
Battery dead but not replacable - What now?
It happens a little bit too often; stuff that you used for one or several years with much pleasures, just stops working. Battery dead! Well, yes, the built in rechargeable battery won't charge anymore. One thing you could do is to give in to it and buy something new. But what if you refuse to throw away your favorite item that you re-charged less than 50 times? Or what if the item cannot be bought new, because it was only sold for 2 years? Well, fix it! In the age of the internet you can now find a solution to almost any problem, including how to repair or replace dead batteries for many items.
I would like share the case of my mp3 player. It did not charge so many times and just stopped working. I found several instructions to it (my main source seems dead, but this one is also good) and it was so interesting that I decided to try it. The short explanation: a too long battery pause can cause a hardware switch to set the battery in inoperable state. This switch can be undone by de- and re-solder the battery. In this case you don't need a new battery at all! So I tried:
I soldered it back on, I put it back together, and plugged it in for charging.
And guess what? It worked!
It took me only 20 minutes (and no ordering of new batteries) and was definitely worth doing!
There was another item I wanted to fix, which many of you may have: an Oral B toothbrush with a dead battery:
And there are many manuals online that show how to replace the battery: Here, and here.
A new battery costs about 10 Euro/Dollar and the replacement is quite tricky, but can be done with patience. It will take about an hour...
And than I considered the following: It is an hygiene item. The bottom side is really full of microorganisms such as algae that got in the rubber and cannot be washed out... Also the grip got more difficult to clean. And it should be clean, you stuck it into your mouth...! I admit, in this case I bought a new one for 20 Euros and saved an hour of messing around.
I really wonder, who makes these pervert designs? It should be no problem to earn money with the replacement brushes and make the electric holder partially out of metal for more easy cleaning. And the bottom out of plastic with a screw system for easy battery replacement. Technically no problem at all! You then could easily use your toothbrush for 10+ years without causing extra waste.
Well, anyhow, many thanks to all the people who write these repair manuals!! I will post more of my successes in the future.
I would like share the case of my mp3 player. It did not charge so many times and just stopped working. I found several instructions to it (my main source seems dead, but this one is also good) and it was so interesting that I decided to try it. The short explanation: a too long battery pause can cause a hardware switch to set the battery in inoperable state. This switch can be undone by de- and re-solder the battery. In this case you don't need a new battery at all! So I tried:
And guess what? It worked!
It took me only 20 minutes (and no ordering of new batteries) and was definitely worth doing!
There was another item I wanted to fix, which many of you may have: an Oral B toothbrush with a dead battery:
And there are many manuals online that show how to replace the battery: Here, and here.
A new battery costs about 10 Euro/Dollar and the replacement is quite tricky, but can be done with patience. It will take about an hour...
And than I considered the following: It is an hygiene item. The bottom side is really full of microorganisms such as algae that got in the rubber and cannot be washed out... Also the grip got more difficult to clean. And it should be clean, you stuck it into your mouth...! I admit, in this case I bought a new one for 20 Euros and saved an hour of messing around.
I really wonder, who makes these pervert designs? It should be no problem to earn money with the replacement brushes and make the electric holder partially out of metal for more easy cleaning. And the bottom out of plastic with a screw system for easy battery replacement. Technically no problem at all! You then could easily use your toothbrush for 10+ years without causing extra waste.
Well, anyhow, many thanks to all the people who write these repair manuals!! I will post more of my successes in the future.
Sonntag, 19. Februar 2017
Convenient life-hack for an entomologist - solution to troublesome pin holding
If you ever have tried to identify a pinned insect, you may have been either irritated that holding the pin in your hand to see all sides is exhausting your muscles, or have been irritated that the pin is fixed somewhere and you can't see the side you need to observe. This very simple aid solves the problem.
Take a rectangular piece of polyethylene foam used as bottom inlay for insect boxes (or use something similar), about 5 by 5 cm. Take an apple corer and rotate very slowly with mild pressure into the foam to get the nice round hole in it. It exactly fits a finger! I usually use it on my forefinger or my thumb; sometimes I use two at the same time! And you can pin multiple specimens on one at the time and compare them. A very convenient life-hack for an entomologist.

Take a rectangular piece of polyethylene foam used as bottom inlay for insect boxes (or use something similar), about 5 by 5 cm. Take an apple corer and rotate very slowly with mild pressure into the foam to get the nice round hole in it. It exactly fits a finger! I usually use it on my forefinger or my thumb; sometimes I use two at the same time! And you can pin multiple specimens on one at the time and compare them. A very convenient life-hack for an entomologist.

Samstag, 26. November 2016
When do you throw your food away?
It is a challenge for all of us: we do not want to eat bad food, but neither we want to be bad for the environment or a shame to hungry people. So when do we throw our food away? When the date is expired, or when it looks or smells bad? Every person has its own way, but it makes sense to give it more thought. Therefore I made this diagram to make a fair and healthy decision.

Diagram to determine if your food is good or bad
Rule of thirds
When you buy a product, look at the 'best before' date. Count the days, weeks or months that is in the future and add one third: this is the more realistic date of expiration. So: the for milk you may have three days left, but you can probably use it four days; for a glass of vegetables for which you have 9 months will last 12, etc. Some products like flour, pasta, rice and some canned food will even last much longer. Meat that expires the next day, may last 0.3 day longer, but with such low margins you better stick to the date!
Why is it important not to throw it away on the expiration date? Because manufacturers reduce the expiration date every year silently and this seems an ongoing loop. So more and more food is wasted every year! See here (NL) and here (DE). Throwing it away on the expiration date is not very responsible.

The shelf life is actively reduced by manufacturers that set the expiration date earlier. As a result people are surprised that their food is expired earlier, but still throw it away, increasing food waste. They buy a new package instead. As a result sales go up. Now the manufacturers have an incentive to further reduce the shelf life of their products. Completely unnecessarily from the point of the food quality! Therefore it makes sense to use the diagram above to determine if you should throw your food away instead of the date!
Final notes
- It is mostly safe to follow the diagram here, but it is on your own risk. Internet resources like this one can give you advice but cannot be hold responsible
- The manufacturer can be hold responsible for food going bad when it happens before the 'best before date'. Therefore it is logical to have the date early set, but there are not any legal rules for how early.
- Because the date is set earlier year by year, the rule of thirds is very rough and may be one day rather a 'rule of halfs'.
Sonntag, 13. November 2016
The supermoon of 14.11.2016 explained

Supermoon
The Moon has an elliptical orbit around Earth, and the Earth is not exactly in the middle (like the yolk in the egg). Therefore each month the Moon has a close position to Earth (Perigee) and a far position to Earth (Apogee). When it is close, it appears on average 14% larger (in diameter) and 30% (surface area) brighter when it is full moon. When both Perigee moon and full moon occur together, we speak of a supermoon (in far position of a micromoon).
The Earth has a similar elliptical orbit around the sun and also has a close and far position to the sun, together with the Moon. Hence, sometimes the gravity effect of the Sun is stronger than other times, causing the Moon to vary in its far and close position. The close position varies roughly between
356.000 and 371.000 km while the far position varies roughly between 404.000 and 407.000 km.

Far and close distances for every moon rotation from 2001 to 2100. Data Source: Moon Perigee and Apogee Table Courtesy of Fred Espenak, www.Astropixels.com. Full moons are in yellow, data Source: Keith Cooley, http://home.hiwaay.net/~krcool/Astro/moon/fullmoon.htm.
When the Earth would not turn around the Sun, the close distance would always fall together with a full moon. But because of the rotation around the sun, the light angle changes, causing a small shift in the cycle of full moon. After 14 moon cycles, both cycles are in the same position again, with a full moon in the close position, hence almost once every year! The interesting thing is that it is mostly never the same position relative to the sun, and therefore somewhere between 356.000 - 371.000 km as explained above. And that makes the the 14.11.2016 special; this full moon in Perigee position is closer than after most other 14 moon cycles. A super close, superbig moon! However this difference is much smaller than between a Perigee and Apogee month.

A close-up of the previous graph (only the very low band with full moons!), with the 100 closest moons from 2001 to 2100 and full moon in yellow and the dates everyone is talking about in orange. Closer moons will follow several times this century, so it is not so rare. And remember from the first graph: the distance and hence appearance diameters of all full moons in this graph do not much differ to the eye and are actually all supermoons!
The moon illusion
People often think they see a supermoon. But in fact they are victim of the so called moon illusion! A very good explanation is on Wikipedia.
Abonnieren
Posts (Atom)